
Manual air ride diagrams provide a visual guide for understanding and installing air suspension systems, helping users diagnose and maintain their setups effectively for optimal performance.
1.1 Overview of Air Ride Suspension Systems
Air ride suspension systems utilize compressed air to adjust a vehicle’s height and stiffness, providing improved load capacity and stability. These systems are designed to maintain optimal ride quality by automatically adjusting to varying road conditions and payloads. Compressed air is stored in tanks and distributed through valves to air actuators, which replace traditional coil springs or shocks. This setup allows for real-time adjustments, enabling drivers to lower or raise their vehicle for easier loading, improved aerodynamics, or enhanced off-road performance. Air ride systems are commonly found in heavy-duty trucks, luxury vehicles, and custom builds, offering versatility and precision control over suspension dynamics.
1.2 Importance of Manual Air Ride Diagrams
Manual air ride diagrams are essential for understanding and working with air suspension systems. They provide a detailed visual representation of the system’s components, connections, and operation, making it easier to identify parts and their functions. These diagrams are crucial for installation, troubleshooting, and maintenance, as they guide users through complex procedures step-by-step. By referencing a manual air ride diagram, technicians and enthusiasts can diagnose issues more efficiently, ensuring proper repairs and adjustments. Additionally, these diagrams help prevent costly mistakes by clarifying how components interact and how to safely modify or upgrade the system. They are indispensable for anyone aiming to maximize the performance and reliability of their air ride setup.
1.3 Benefits of Understanding Air Ride Diagrams
Understanding air ride diagrams offers numerous benefits, including enhanced system performance and reliability. By interpreting these diagrams, users can identify components, connections, and operational sequences, enabling precise troubleshooting and efficient repairs. This knowledge allows for better customization, as users can modify settings to achieve desired ride heights and stiffness. Improved safety is another advantage, as proper system understanding reduces the risk of accidents caused by incorrect installations or adjustments. Additionally, understanding air ride diagrams empowers users to perform routine maintenance effectively, extending the lifespan of the system. Overall, this knowledge is vital for optimizing the functionality and longevity of air suspension systems, making it a valuable skill for both professionals and enthusiasts.
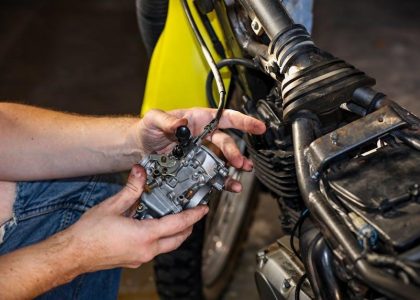
Components of a Manual Air Ride System
A manual air ride system comprises key components like compressors, air tanks, valves, sensors, and actuators, each playing a crucial role in maintaining optimal suspension performance and control.
2.1 Air Compressor and Its Function
The air compressor is the heart of a manual air ride system, responsible for generating and supplying compressed air to the suspension components. It converts electrical energy into pressurized air, which is then stored in air tanks for system operation. The compressor’s performance directly impacts the system’s ability to adjust ride height and damping. Most compressors are either single-cylinder or multi-cylinder designs, with the latter offering faster refill times. Proper installation and maintenance of the compressor are critical to ensure reliable operation. Sensors and pressure switches typically control the compressor, turning it on or off to maintain optimal air pressure levels. Regular checks for wear, leaks, and thermal overload are essential to prolong its lifespan and ensure consistent performance across various driving conditions.
2.2 Air Tanks and Storage Capacity
Air tanks are essential components in a manual air ride system, serving as storage units for compressed air. They come in various sizes, ranging from small reservoirs to larger tanks, depending on the system’s requirements. The storage capacity of these tanks determines how much air is available for suspension adjustments, ride height control, and damping. Proper sizing ensures consistent performance, especially under varying load conditions. Air tanks are typically made of durable materials like steel or aluminum to withstand high pressure. They are equipped with ports for inlet, outlet, and drain valves, facilitating air flow and maintenance. Regular inspection of the tanks for leaks or corrosion is crucial to maintain system reliability. The correct installation and sizing of air tanks are vital to ensure optimal functionality and safety of the air ride system.
2.3 Valves and Their Roles in the System

Valves play a critical role in manual air ride systems by controlling the flow of compressed air throughout the suspension. They ensure proper pressure distribution, enabling height adjustments and maintaining stability. Solenoid valves are commonly used to regulate air flow electronically, while manual valves provide a failsafe for system control. These components are essential for directing air to actuators, tanks, and other parts, ensuring smooth operation. Proper valve function is vital for maintaining ride quality and safety. Regular inspection and maintenance of valves are recommended to prevent leaks or malfunctions. Their precise operation ensures the system responds accurately to driver inputs, making them indispensable for reliable performance and optimal suspension control.
2.4 Sensors and Control Modules
Sensors and control modules are essential for monitoring and managing the air ride system’s performance. Pressure sensors detect air pressure levels in the tanks and lines, ensuring optimal suspension adjustments. Height sensors monitor the vehicle’s ride height, providing data to the control module for precise adjustments. The control module acts as the system’s brain, processing sensor data to regulate valve operations and maintain stability. These components work together to ensure smooth ride quality, automatic leveling, and responsive height adjustments. Proper installation and calibration of sensors and control modules are critical for reliable system operation. Regular checks and updates to the control module’s software can enhance performance and prevent malfunctions, ensuring the air ride system functions as intended.
2.5 Actuators and Their Mechanisms
Actuators are critical components in manual air ride systems, converting compressed air into mechanical movement to adjust suspension height and stiffness. These devices, often pneumatic cylinders, are connected to the suspension links or air bags, enabling precise control over the vehicle’s ride height and load capacity. The actuator’s mechanism involves the inflow and outflow of compressed air, controlled by valves and sensors, to raise or lower the vehicle smoothly. Proper installation and alignment of actuators are essential for even weight distribution and optimal performance. Regular maintenance, such as checking for air leaks and lubricating moving parts, ensures reliable operation. Actuators are typically durable but require careful handling to avoid damage from over-pressurization or contamination. Their seamless integration with the system’s control module ensures responsive and accurate height adjustments, making them indispensable for air ride functionality and stability.
Installation Guide for Manual Air Ride Systems
A comprehensive guide detailing step-by-step processes for installing manual air ride systems, ensuring proper setup and functionality for optimal vehicle performance and safety.

3.1 Pre-Installation Checks and Requirements
Before installing a manual air ride system, ensure all components are compatible with your vehicle. Check the air compressor, tanks, and valves for any damage or leaks. Verify the system’s pressure rating matches your vehicle’s weight and intended use. Proper tools and materials, such as wrenches, air hoses, and fittings, are essential. Consult the manufacturer’s specifications for torque values and installation guidelines. Ensure a clean, dry workspace to prevent contamination. Familiarize yourself with the wiring diagram to avoid electrical issues. Lastly, test the system at a low pressure to identify any potential leaks or malfunctions before full installation.
3.2 Step-by-Step Installation Process
Begin by preparing the vehicle and workspace, ensuring all tools and materials are within reach. Mount the air compressor securely, connecting it to the air tank. Install the tank in a convenient location, ensuring proper ventilation. Next, connect the valves and sensors according to the manual air ride diagram. Route the air lines carefully, avoiding sharp bends or kinks. Install the actuators near the suspension components, ensuring correct alignment. Connect the electrical wiring to the control module, following the wiring diagram. Test the system by inflating the bags slowly, checking for leaks. Finally, calibrate the system to achieve the desired ride height and performance. Always refer to the manufacturer’s instructions for specific details.
3.3 Tools and Materials Needed
Installing a manual air ride system requires specific tools and materials. Essential tools include wrenches, screwdrivers, pliers, and air line cutters. Specialized tools like air line fittings and connectors are necessary for secure connections. An air compressor is crucial for inflating the system. Materials needed include high-quality air lines, fittings, and mounting hardware for components like the compressor and tank. Electrical supplies, such as wiring and connectors, are required for integrating sensors and control modules. Additional items like pressure gauges and protective materials (e.g., silicone sealant) can prevent leaks and ensure longevity. Always refer to the manual air ride diagram for specific requirements, as some systems may need additional components. Gathering all necessary tools and materials beforehand ensures a smooth installation process.
3.4 Common Mistakes to Avoid
When installing a manual air ride system, common mistakes include improper installation of components, such as misaligning the air compressor or incorrectly connecting air lines. Neglecting to follow the manual air ride diagram can lead to system malfunctions. Overlooking regular maintenance, like checking air pressure or inspecting for leaks, can result in premature wear. Another mistake is using low-quality materials, which may compromise system performance and safety. Additionally, failing to test the system thoroughly after installation can lead to unexpected issues. Always ensure proper grounding of electrical components and avoid over-tightening connections, as this can damage fittings. By adhering to the manual and performing regular checks, these common pitfalls can be avoided, ensuring a reliable and efficient air ride system.

Maintenance and Upkeep of Air Ride Systems
Regular maintenance ensures optimal performance and longevity of air ride systems, involving checks for leaks, cleaning filters, and lubricating moving parts to prevent wear and tear.
4.1 Regular Checks and Inspections
Regular checks and inspections are crucial for maintaining air ride systems. Start by examining the air compressor for proper function and ensuring it operates within the recommended pressure range. Next, inspect the air tanks for any signs of rust or corrosion, which can weaken their structural integrity. Check all valves to ensure they open and close smoothly, as faulty valves can disrupt airflow. Sensors and control modules should be tested for accuracy to maintain optimal system performance. Finally, inspect the actuators for any wear or damage, as they play a key role in adjusting the suspension height. Regular inspections help prevent unexpected failures and ensure a smooth ride. Always refer to the manual for specific guidelines tailored to your system.
4.2 Cleaning and Replacing Air Filters
Cleaning and replacing air filters is essential for maintaining the efficiency of your air ride system. Locate the air filter as per your manual, typically near the compressor or intake. Turn off the system and disconnect the power supply before starting. Use a screwdriver to remove the filter housing and gently pull out the filter. Clean it with compressed air if reusable or replace it with a new one if damaged. Reinstall the filter securely to ensure proper sealing. Regularly cleaning or replacing the air filter prevents dust and debris from entering the system, which can cause malfunctions. Check your manual for recommended maintenance intervals to keep your air ride system functioning smoothly and prolong its lifespan.
4.3 Lubrication of Moving Parts
Lubrication of moving parts is crucial for ensuring the smooth operation of your air ride system. Regularly inspect and apply high-quality lubricants to components like actuators, valves, and linkages. Use silicone-based sprays or grease recommended by the manufacturer, as they withstand the system’s pressure and environmental conditions. Lubricate after cleaning the parts to prevent dirt from being trapped. Refer to your manual for specific intervals and methods. Proper lubrication reduces friction, prevents wear, and extends the lifespan of your air ride components. Always clean surfaces before applying lubricant to avoid contamination. Regular maintenance ensures optimal performance and prevents unexpected failures, keeping your system running efficiently for years.
4.4 Refilling Air Pressure in the System
Refilling air pressure in your manual air ride system is essential for maintaining proper functionality. Use a high-quality air compressor to refill the air tanks to the recommended pressure level, typically between 90-120 PSI. Always turn off the system before refilling to ensure safety. Check for any leaks by applying soapy water to connections and hoses. If bubbles form, there’s a leak that needs immediate attention. Use a pressure gauge to monitor the pressure accurately. Over-pressurization can damage components, so never exceed the manufacturer’s guidelines. Regularly check the system’s pressure, especially before long trips or heavy loads. Proper pressure levels ensure a smooth ride and optimal performance. Always refer to your manual for specific instructions tailored to your system. Regular maintenance prevents issues and keeps your air ride system functioning reliably.
Troubleshooting Common Issues
Identify leaks by inspecting hoses and connections with soapy water. Check compressor function and sensor accuracy. Ensure proper air flow and pressure levels for smooth operation.

5.1 Identifying Leaks in the System
Identifying leaks in a manual air ride system is crucial for maintaining optimal performance. Start by visually inspecting air lines, fittings, and valve seals for visible cracks or damage. Use a soap solution to check for bubbles, which indicate escaping air. Listen for hissing sounds near connections or components. Ensure the compressor is functioning properly, as excessive pressure can exacerbate leaks. Regularly inspect the air tank and lines for moisture or rust, which can weaken the system. Addressing leaks promptly prevents air pressure loss and potential system failure. Always refer to the manual air ride diagram for locating components and ensuring proper connections. Regular inspections and maintenance are key to avoiding costly repairs and ensuring reliable operation.
5.2 Diagnosing Compressor Failures
Diagnosing compressor failures in a manual air ride system involves checking for common issues such as unusual noises, reduced air pressure, or the compressor not turning on. Start by inspecting the power supply and ensuring all electrical connections are secure. Check the fuses or relays controlling the compressor for any signs of damage or failure. Listen for abnormal sounds like grinding or screeching, which may indicate worn internal components. Verify the air filter is clean and free from blockages, as restricted airflow can overload the compressor. Refer to the manual air ride diagram to locate the compressor and associated components. If the issue persists, consider replacing the compressor or consulting a professional. Regular maintenance and inspections can help prevent premature compressor failure and ensure reliable system operation.
5.3 Resolving Sensor Malfunctions
Resolving sensor malfunctions in a manual air ride system begins with identifying the specific sensor causing the issue. Start by checking the wiring and connections to ensure they are secure and free from damage. Use a multimeter to verify the power supply to the sensor and consult the manual air ride diagram to locate the sensor’s position and connections. Clean the sensor if it is dirty or clogged, as debris can interfere with its accuracy. If the sensor is faulty, replace it with a compatible unit. After replacement, recalibrate the system to ensure proper functionality. Regular inspections and maintenance can help prevent sensor malfunctions, ensuring smooth operation of the air ride system. Always refer to the manual for specific instructions tailored to your system.
5.4 Fixing Valve and Actuator Problems
Fixing valve and actuator problems in a manual air ride system requires careful inspection and methodical troubleshooting. Start by checking the valves for leaks or blockages, as these are common issues. Clean or replace faulty valves to ensure proper air flow. For actuators, inspect for mechanical damage or misalignment, which can disrupt height adjustment. Lubricate moving parts if necessary and ensure all connections are secure. Refer to the manual air ride diagram to identify the correct sequence of operation. If the actuator fails to respond, check the control module and wiring for faults. Testing the system after repairs is crucial to confirm functionality. Regular maintenance can prevent valve and actuator issues, ensuring reliable performance of the air ride system.

Safety Precautions and Best Practices
Always handle compressed air with care, wear protective gear, and follow manual guidelines to ensure safe operation and avoid system damage or personal injury risks.
6.1 Handling Compressed Air Safely
Handling compressed air safely is crucial to prevent accidents and system damage. Always wear protective gear, including safety glasses and gloves, when working with compressed air systems. Ensure the area is well-ventilated to avoid inhaling compressed air or dust. Regularly inspect air hoses and connections for leaks or damage, as high-pressure air can cause sudden failures. Never exceed the recommended pressure limits specified in the manual. Store compressed air components in a cool, dry place away from flammable materials. Follow manufacturer guidelines for proper handling and maintenance. Always depressurize the system before performing any repairs or inspections. Keep emergency procedures handy in case of accidental pressure release or system failure. Proper training and adherence to safety protocols can prevent injuries and ensure reliable system operation.
6.2 Proper Use of Tools and Equipment
Proper use of tools and equipment is essential for safe and effective work with manual air ride systems. Always use tools specifically designed for the task, as generic tools may damage components. Refer to the manual for recommended tools and equipment. Inspect tools regularly for wear or damage, replacing them if necessary. Ensure the vehicle is securely lifted or supported before starting work. Use torque wrenches for precise bolt tightening to avoid overtightening. Keep the workspace clean and well-lit to prevent accidents. Store tools in a dry, organized area to maintain their condition. Never use compressed air to clean clothing or skin, as it can cause injury. By following these guidelines, you can ensure efficient and safe maintenance of your air ride system.
6.3 Emergency Procedures for System Failure
In case of a manual air ride system failure, prioritize safety by pulling over to a flat, stable surface immediately. Turn off the engine and engage the parking brake to prevent any unintended movement. If the system fails while driving, avoid sudden braking or acceleration, as this could destabilize the vehicle. Notify all passengers of the situation and ensure everyone remains calm. Do not attempt to continue driving, as this could worsen the issue or lead to an accident. Use jack stands or other stabilizing equipment to secure the vehicle if necessary. Contact a professional mechanic or roadside assistance for help. Avoid attempting repairs without proper tools or knowledge, as this could cause further damage or safety risks. Always follow the manufacturer’s guidelines for emergency procedures to ensure your safety and the integrity of the system.

Advanced Customization and Modifications
Advanced customization allows users to tailor their air ride systems for specific needs, enhancing performance and aesthetics through upgraded components and precise adjustments.

7.1 Upgrading Air Ride Components
Upgrading air ride components enhances system performance and customization. Replacing stock parts with high-quality aftermarket alternatives, such as advanced compressors or larger air tanks, improves reliability and efficiency. Modern sensors and control modules can also be upgraded for better precision and responsiveness. Additionally, installing adjustable valves and actuators allows for fine-tuned suspension settings, catering to specific driving preferences or load requirements. When upgrading, ensure compatibility with existing system components to maintain optimal functionality. Proper installation is crucial, and consulting a professional may be necessary for complex modifications. Regular maintenance and inspections should follow any upgrade to ensure longevity and safety. Upgrading air ride components is a great way to personalize and enhance your vehicle’s suspension system for superior comfort and control.
7.2 Installing Aftermarket Air Suspension Kits
Installing aftermarket air suspension kits offers enhanced performance and customization. These kits typically include pre-assembled components like air bags, shocks, and control systems, simplifying the installation process. Ensure compatibility with your vehicle’s make and model before purchasing. Follow the manufacturer’s instructions carefully, as improper installation can lead to system malfunctions. Key steps include disconnecting the battery, removing the old suspension, and mounting the new components securely. Wiring the control module and testing the system are crucial final steps. Professional assistance is recommended for complex setups. After installation, adjust the ride height and settings according to your preferences; Regular maintenance, such as checking air pressure and inspecting lines, ensures optimal functionality. Aftermarket kits provide a seamless upgrade, improving both ride quality and vehicle aesthetics.
7.3 Adjusting Ride Height for Specific Needs
Adjusting ride height in an air suspension system allows customization for various driving conditions or aesthetic preferences. Use the control panel or manual valves to raise or lower the vehicle. This feature is particularly useful for improving ground clearance, reducing drag, or enhancing stability. Always refer to the system’s manual for specific adjustment guidelines. Ensure the vehicle is on level ground and the air pressure is within the recommended range. After adjustments, test the vehicle’s handling to confirm stability. Regular checks are essential to maintain optimal performance. Adjustments should be made cautiously to avoid system damage. For complex modifications, consult a professional to ensure safety and functionality.

Future Trends in Air Ride Technology
Future trends include integrating smart suspension systems, advanced control modules, and autonomous adjustments for real-time optimization, enhancing comfort, efficiency, and safety in air ride technology;

8.1 Integration of Smart Suspension Systems
The integration of smart suspension systems represents a significant leap in air ride technology, enabling real-time adjustments based on road conditions and vehicle load. These systems utilize advanced sensors and AI-driven algorithms to optimize ride comfort and stability. By continuously monitoring factors like speed, acceleration, and suspension travel, smart suspensions can automatically adapt to varying driving scenarios. This integration not only enhances performance but also improves safety by reducing the risk of instability. Additionally, smart systems can learn from driving patterns, offering personalized settings for drivers. As technology advances, the seamless integration of these systems into manual air ride diagrams will become increasingly common, setting new standards for suspension technology.
8.2 Advancements in Air Ride Control Modules
Recent advancements in air ride control modules have revolutionized how suspension systems operate, offering enhanced precision and adaptability. Modern control modules now incorporate cutting-edge technologies like AI and IoT, enabling real-time monitoring and adaptive adjustments. These modules can seamlessly integrate with other vehicle systems, such as ABS and stability control, to provide a holistic approach to suspension management. The improved algorithms allow for faster response times, ensuring a smoother ride and better handling. Additionally, these modules offer customizable settings, catering to individual preferences and driving conditions. With the ability to analyze data and predict potential issues, advanced control modules are paving the way for smarter, more efficient air ride systems. This innovation is set to redefine the future of suspension technology, making vehicles safer and more comfortable than ever before.