

Ultra clear epoxy is a versatile, high-clarity resin ideal for DIY projects and professional applications, offering durability and a sleek finish for surfaces, art, and more.
What is Ultra Clear Epoxy?
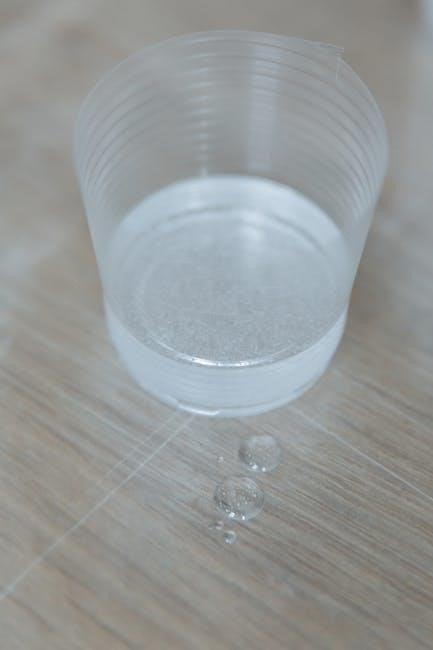
Ultra clear epoxy is a two-component epoxy resin system, consisting of a resin and a hardener. When mixed together, they form a durable, high-clarity coating or casting material. It is 100% solids, making it ideal for creating smooth, glossy finishes on surfaces like tabletops, bars, and art projects. Known for its UV stability and bubble-resistant properties, ultra clear epoxy is perfect for achieving professional-looking results in both DIY and professional applications. It is highly versatile and can be used for casting, coating, or laminating various materials.
Common Applications of Ultra Clear Epoxy
Ultra clear epoxy is widely used for creating durable, high-gloss finishes on surfaces like bar tops, tables, and countertops. It is also popular for casting decorative items, such as jewelry, river tables, and resin art. Additionally, it is applied as a protective coating for floors, wood surfaces, and metal to enhance appearance and durability. Its bubble-resistant and UV-stable properties make it ideal for both DIY projects and professional applications, ensuring a clear, long-lasting finish for various creative and industrial purposes.
Preparation for Using Ultra Clear Epoxy
Preparing ultra clear epoxy requires a clean, dry workspace at 77°F (25°C). Ensure surfaces are properly sanded, cleaned, and free from dust for optimal adhesion and results.
Surface Preparation and Workspace Setup
Ensure your workspace is clean, dry, and free from dust and humidity. The ideal working temperature is between 70°F and 85°F (21°C to 29°C). Use a leveled surface and cover it with protective materials like drop cloths or plastic sheets. Proper ventilation is essential to avoid inhaling fumes. Sand the surface to be coated, ensuring it is smooth and free of grease or oils. Wipe clean with a solvent to remove any residue. Organize your tools and materials beforehand to streamline the process.
- Avoid high humidity to prevent uneven curing.
- Ensure the area is well-ventilated for safety.
Choosing the Right Tools and Materials
Selecting the right tools and materials is crucial for a successful ultra-clear epoxy project. Essential tools include a digital scale for precise measurements, mixing cups, stir sticks, and a heat gun for removing bubbles. Use protective gloves, goggles, and a dust mask for safety. Ensure you have a clean, dry workspace with drop cloths or plastic sheets to protect surfaces. Choose a high-quality epoxy resin and hardener specifically designed for your project type. Optional tools like a torch or pressure pot can help achieve a bubble-free finish. Always follow the manufacturer’s recommendations for materials.
- Digital scale for accurate mixing ratios.
- Mixing cups and stir sticks for thorough blending.
- Protective gear to ensure safety during application.
Mixing Ultra Clear Epoxy
Mixing ultra-clear epoxy requires precise measurements, typically a 1:1 ratio by volume. Use a digital scale for accuracy and mix thoroughly to avoid air bubbles.
Understanding the Resin-to-Hardener Ratio
The resin-to-hardener ratio is critical for proper curing. Most ultra-clear epoxies use a 1:1 ratio by volume, but some products may require weight-based measurements. Always follow the manufacturer’s instructions to ensure the chemical reaction occurs correctly. Incorrect ratios can lead to incomplete curing, brittleness, or a tacky surface. For precise mixing, use a digital scale, especially for large batches. Proper measurement ensures a durable, bubble-free finish and optimal performance of the epoxy in your project.
Step-by-Step Mixing Instructions
Begin by ensuring your workspace is clean and well-ventilated. Measure the resin and hardener according to the recommended ratio, typically 1:1 by volume. Use a digital scale for accuracy, especially for larger batches. Mix in a round container to minimize air bubbles. Stir slowly and thoroughly for 3-5 minutes with a mixing stick, ensuring no streaks remain. Avoid whipping, as this introduces air. Pour immediately after mixing to prevent the epoxy from curing in the container. Work in a stable environment, ideally between 70-85°F, and away from direct sunlight.
Applying Ultra Clear Epoxy
Apply ultra clear epoxy using brushes, rollers, or pouring techniques. Ensure a clean, dry surface and use tools like foam brushes or squeegees for smooth, even coverage.
Methods of Application (Brushing, Rolling, Pouring)
Ultra clear epoxy can be applied using brushing, rolling, or pouring methods. Brushing is ideal for detailed surfaces or small areas, while rolling ensures even coverage on larger surfaces. Pouring is perfect for creating smooth, bubble-free finishes, especially in molds or tabletops. Use foam brushes or rollers with extensions for hard-to-reach areas. For pouring, mix thoroughly and pour slowly to minimize air bubbles. Heat guns or toothpicks can help eliminate trapped air for a professional finish. Always work on a clean, dry surface for optimal results.
Tips for Achieving a Smooth, Bubble-Free Finish
To achieve a smooth, bubble-free finish with ultra clear epoxy, ensure your workspace is clean and dust-free. Mix the resin and hardener thoroughly, and pour slowly to minimize air bubbles. Use a heat gun or toothpick to gently pop any bubbles that form. Avoid over-mixing, as this can introduce air. Apply thin layers, allowing each to cure slightly before adding more. Work in a stable temperature and humidity environment to prevent uneven drying. Proper surface preparation and patience are key to a professional-looking result.

Curing and Drying
Curing occurs when the resin and hardener fully react, typically taking 12-24 hours to touch and 72 hours for full cure. Environmental factors like temperature and humidity significantly impact curing speed.
Curing Time and Environmental Factors
Ultra clear epoxy typically cures to the touch within 12-24 hours and fully cures in 72 hours. Environmental factors like temperature (70-85°F ideal) and humidity significantly impact curing speed. Higher temperatures accelerate curing, while lower temperatures slow it down. High humidity can lead to surface issues, so a clean, dry workspace is essential. Maintaining optimal conditions ensures a smooth, bubble-free finish and proper bonding. Always follow specific product instructions for precise curing times and environmental recommendations.
Optimal Conditions for Faster Curing
For faster curing, maintain a temperature range of 70°F to 85°F (21°C to 29°C). Ideal conditions include low humidity (below 70%) and good air circulation. Avoid working in direct sunlight or extreme heat, as this can cause uneven curing. A clean, dry workspace free from dust and contaminants ensures proper bonding and a smooth finish. Using fans to improve ventilation can help speed up the curing process without introducing dust. Always adhere to the manufacturer’s guidelines for specific product recommendations.

Troubleshooting Common Issues
Identify and fix bubbles, cracks, or uneven surfaces by using heat for bubbles and adjusting temperature or humidity for proper curing and surface consistency.
Identifying and Fixing Bubbles, Cracks, and Uneven Surfaces
For bubbles, use a heat gun or torch to gently heat and pop them. Cracks may form due to uneven curing; apply additional epoxy to fill and smooth. Uneven surfaces can result from improper mixing or application. To prevent these issues, ensure accurate resin-to-hardener ratios, work in a stable environment, and pour in thin, controlled layers. Regularly inspect the surface during curing and address imperfections promptly for a flawless finish. Proper preparation and patience are key to avoiding these common challenges.
Adjusting for Temperature and Humidity
Temperature and humidity significantly impact epoxy curing. Ideal conditions are between 70°F and 85°F with low humidity. High heat accelerates curing, while cold slows it down. If working in warmer environments, mix smaller batches to prevent overheating. In cooler conditions, allow more time for curing. Humidity can cause surface imperfections; ensure the workspace is dry and dust-free. Monitor environmental factors closely to achieve optimal results. Adjust your application and curing times accordingly to ensure a smooth, professional finish. Proper environmental control is crucial for successful epoxy projects.
Safety Precautions and Best Practices
Wear protective gear, including gloves and goggles, and work in a well-ventilated area. Avoid skin contact and ensure proper storage and disposal of epoxy materials.
Protective Gear and Ventilation
Always wear protective gloves, goggles, and a mask when handling ultra clear epoxy to avoid skin irritation and inhalation of fumes. Ensure good ventilation by working in a well-ventilated area or using fans to dissipate vapors. Avoid working in confined spaces without proper airflow to minimize health risks. Keep the workspace clean and free from dust to ensure a smooth application process. Proper safety measures are essential for a safe and successful epoxy project.
Storage and Disposal of Epoxy Materials
Store ultra clear epoxy resin and hardener in a cool, dry place, away from direct sunlight and moisture. Keep containers tightly sealed to prevent contamination. Dispose of unused epoxy according to local regulations, as it may be considered hazardous waste. Cured epoxy is non-hazardous and can be discarded in regular trash. Clean tools and materials with solvent before disposal. Proper storage and disposal ensure safety and environmental protection.

FAQs and Common Questions
Common questions include can epoxy be applied over paint? and how long does it take to cure? These topics are addressed in detail within this guide for clarity and success.
Can You Apply Epoxy Over Paint?
Yes, epoxy can be applied over paint, but proper preparation is essential. The paint must be fully cured, clean, and lightly sanded to ensure good adhesion. Remove any grease, oils, or contaminants from the surface. If the paint is peeling or unstable, it’s best to remove it before applying epoxy. For optimal results, ensure the painted surface is dry and free of dust. In some cases, a primer may be recommended for better bonding. Always follow the epoxy manufacturer’s guidelines for application over painted surfaces.
How Long Does It Take for Epoxy to Cure?
Epoxy curing time varies depending on environmental conditions. Typically, it takes 12-24 hours to touch and 72 hours for full cure. Optimal conditions, such as temperatures between 70°F and 85°F and low humidity, accelerate curing. Higher temperatures can reduce curing time, while lower temperatures slow it down. Ensure the epoxy is mixed correctly and applied in a clean, dry environment for consistent results. Always consult the product’s instructions for specific curing times, as formulations may differ.
Ultra clear epoxy offers exceptional results when used correctly. Always follow instructions, ensure proper preparation, and maintain ideal environmental conditions for a successful, professional finish.
Final Tips for Successful Projects
For optimal results, work in a clean, dry environment with temperatures between 70°F and 85°F. Avoid high humidity and ensure surfaces are properly prepared. Mix resin and hardener thoroughly, following the 1:1 ratio, and use a torch or heat gun to eliminate bubbles. Apply thin layers, allowing each to cure before adding the next. Always wear protective gear and ensure good ventilation. Follow instructions precisely and plan your project carefully to achieve a professional, bubble-free finish. Proper preparation and patience are key to success with ultra-clear epoxy.
Recommended Resources for Further Learning
For deeper insights, explore the Crystal Clear Epoxy Resin Basic Instruction Manual and the Ultra Clear Bar and Table Top Epoxy Instructions, which offer detailed guides. Watch tutorials like the Entropy Resins Water-Clear Epoxy System for casting techniques. Visit manufacturer websites for specific product guides, such as the Promise Table Top Epoxy Instructions. Additionally, forums and DIY communities share tips and troubleshooting advice. Always refer to safety guidelines and manufacturer instructions for optimal results with ultra-clear epoxy applications.